Junk piles up faster than we notice. It creeps into corners, garages, and vacant lots. But dumping it has become an intelligent science. Junk removal is no longer just tossing things away.
Today’s junk Temecula Dump is transforming into sorting hubs. Items are weighed, scanned, and classified on arrival. Machines check for metals, plastics, textiles, or toxins. Smart tracking helps manage waste and recover value.
Some junk is even tagged before being dumped. This includes QR codes for digital tracking. Workers and AI systems trace origin and type. It makes disposal more accountable and efficient.
Dumping has changed with the rise of floating platforms. Junk from islands and river towns now gets hauled to floating barges. These dumps sort and compress right on the water. It’s an innovative solution for inaccessible locations.
Advanced dump sites now capture methane gas. This gas comes from decomposing junk. It’s harvested and converted into energy. Dumps are slowly becoming energy farms in disguise.
Sensors in dumps now alert staff about heat levels. If a chemical mix causes heat spikes, staff is notified. Fires are prevented with early detection. It protects the environment and workers.
Junk removal is going aerial in certain zones. Helicopters drop magnets to lift metal waste. It’s ideal for rugged, forested, or flooded areas. Aerial dumps are risky but efficient.
Some new dump strategies involve vertical layers. Junk is organized by type in deep, narrow shafts. Robots handle the stacking and sorting. It saves space and simplifies retrieval for recycling.
Thermal mapping is used to manage dangerous junk. Paints, batteries, and electronic waste give off signals. These are flagged and pulled out early. It protects nearby items from contamination.
Art communities are now sourcing from junk dumps. Creators request access to specific materials. Some dumps now partner with artists and schools. This makes junk part of education and culture.
Smart glasses help dump workers find reusable parts. Information appears in their view while they scan junk. They can flag items for collection or resale. Tech makes sorting faster and less exhausting.
There are now junk drop boxes equipped with AI. These are like mailboxes but for broken devices and goods. The AI scans and classifies the input. It sends it to the right dump section without human help.
Some companies offer “dump points” that float. These are mobile pods that travel by truck or drone. People can fill them, then request a pickup. It’s clean, fast, and cuts illegal dumping.
Junk dumps now log emotional data from users. When people discard old furniture or gifts, sensors capture stress signals. This data helps design better drop-off experiences. It turns junk removal into a sensitive process.
Some dumps are now gamified. People earn credits for sorting junk properly. These credits can be redeemed for tools, food, or transport. It encourages public participation and awareness.
Certain dumps use light and color coding. Every junk item is placed on a colored track. Green means compostable, red means hazardous, blue means recyclable. It reduces error and improves flow.
AI bots now monitor dump behavior in real time. They analyze truck arrivals, junk types, and delays. These bots reassign resources and manage traffic. Dumps are becoming smart grids for waste.
Some junk is now infused with microbial treatments. Before dumping, it’s sprayed with bacteria that speed decomposition. This reduces volume and lowers long-term impact. Science is accelerating rot, in a good way.
Personalized junk bins are also trending. Residents use fingerprint or code access. Their dump patterns are logged privately. This builds a data profile to help improve waste habits.
A few dumps now offer real-time transparency dashboards. Citizens can see what’s dumped daily. It builds public trust and discourages illegal activities. Openness drives accountability in modern waste.
Some dump facilities now have vertical gardens on their roofs. These use the heat and gas from below to grow plants. Nature thrives above the junk. It’s a poetic and useful reversal.
Water-saving dumps now reuse condensed vapor. Steam from hot junk piles is collected and filtered. It’s used to clean vehicles and surfaces. Sustainability is found in the dirtiest places.
Interactive robots help with junk education on site. Children and visitors learn from talking machines. They explain why dumping responsibly matters. It’s education right at the heart of waste.
Specialized junk dump pods exist for rare waste types. These include tech junk, pharma junk, and industrial scraps. Each pod has sensors for toxicity and expiration. It helps prevent long-term pollution.
In some areas, dump points emit calming sounds. Nature noises or soft music reduce stress for workers. It creates a more focused and safe environment. Sound therapy is being tested in waste spaces.
Smart dustbins are appearing in local junk centers. These detect whether items are in usable condition. They redirect furniture, tools, or decor to reuse lanes. Salvage becomes the first choice.
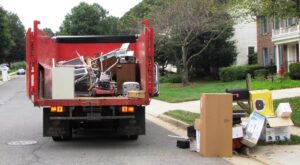
Dump trucks are now being hybridized. They run on a mix of solar and fuel. They also track routes to avoid repeat pickups. Green tech reaches even the dirtiest industries.
Some dumps employ scent barriers. Neutralizers block the strong stench from escaping. These are released through vents or sprayed automatically. Neighbors appreciate the effort to reduce odors.
Materials from old dumps are being dug up. These legacy dumps hold rare resources like copper or lithium. Controlled excavations retrieve valuable junk. What was once buried treasure is now unearthed gold.
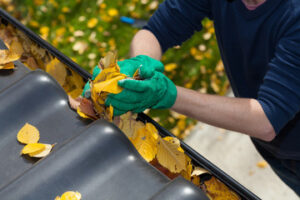
Multi-sensor gloves help workers sort better. They vibrate when touching hazardous or recyclable items. They’re paired with wrist trackers for safety. It’s waste work made smarter and safer.
AI now suggests future junk trends. Based on current dumping patterns, it predicts future problem areas. This helps industries shift production styles. Less waste is generated from the start.
New junk removal methods involve 3D scanning. Broken appliances or structures are scanned before hauling. They are virtually reconstructed to check what can be reused. Technology avoids unnecessary disposal.
Dumps now double as art spaces on weekends. Murals are painted on bins and walls. Junk becomes a theme for reflection. It turns grime into a form of expression.
Ultraviolet lights in dumps help sterilize biohazard junk. They kill bacteria before sorting. This step prevents infections and cross-contamination. Health safety is as crucial as environmental safety.
Dump records are stored on blockchain. Every removal is logged permanently. This ensures no data tampering or false disposal claims. It’s a tamper-proof record of waste ethics.
Thermal drones help during night dumps. They monitor temperatures and movement. Any hotspots or wild animals are detected. Safety continues even when the sun is gone.
Dump centers now have sleep pods for workers. Long shifts are broken with naps. Worker health is now a key performance factor. Junk doesn’t justify burnout.
Junk analysis labs are now integrated with dumps. Samples are taken to study material breakdown. Results inform future product designs. Better packaging begins with better dumping insights.
Biofoam barriers are used to contain dangerous liquid junk. These expand on contact with spills. They block leaks and absorb toxins. Quick action prevents disasters in chemical waste areas.
Dump carts are now programmable. Workers set paths using mobile apps. Carts roll, load, and return automatically. It reduces physical strain and boosts efficiency.
Children are now taken on virtual dump tours. VR headsets show how junk travels and transforms. It instills early responsibility. Digital learning makes dirty topics accessible.
Special areas in dumps are now dedicated to emotional discards. People drop things they can’t throw easily. Letters, photos, and mementos go here. Counselors are available to help during hard releases.
Some dumps now test soil nearby every week. Data is shared with local communities. It builds trust through transparency. Clean ground becomes a shared goal.
Dump sites also try to neutralize negative energy. Aromatherapy sprays and green lights improve morale. Energy healing meets environmental hygiene. Wellness enters unexpected places.
Heavy junk is now lifted with magnetic drones. These reduce worker injuries from manual hauling. Remote control ensures safety. Precision lifting saves time and effort.
New jobs are emerging in junk psychology. Experts analyze why people hoard or discard. Their insights shape dump facility designs. Mind meets matter in junk culture.
Dump technology has also reached animal rescue. Abandoned cages and gear are saved and reused. These serve rescue shelters. Junk becomes a second chance for pets.
The idea of “dumpless” design is growing. Some products are now made to never need dumping. They’re modular, upgradeable, and biodegradable. It’s a full circle toward zero waste.
Junk dumps are also collecting weather data. Heat from decomposition affects local temperatures. This data is shared with climate scientists. Even trash tells a story about the planet.
Dump aesthetics are now taken seriously. Graffiti zones, sculpture corners, and light shows are added. Art turns eyesores into landmarks. Creative cities now embrace their junk with pride.
Disaster zones use smart dump pods with built-in first aid. These store medical kits and dry food. Junk removal supports survival. Dumps become part of relief operations.
Even insects are recruited for dump monitoring. Bees avoid certain toxins and indicate pollution levels. Their behavior helps identify risky zones. Nature partners with tech in waste science.
Modern dumps are no longer just final stops. They are intelligent, adaptive, and evolving systems. Junk is handled with care, creativity, and control. In every dump, there’s a deeper design at work.