Whether your windows are old, leaky or just not working well anymore, they’re an easy upgrade that can dramatically improve your home. New windows are designed to be energy efficient with glazing that blocks UV rays and keeps your home at a comfortable temperature.
Additionally, newer windows can be opened and closed with ease thanks to precision hardware and balanced sashes. Visit https://jrcsi.com/ to learn more.
When your windows are old, leaking, or poorly fitted, they can be a significant source of energy loss. Replacement windows are a good opportunity to upgrade to better energy efficient models. These upgrades can reduce your utility bills significantly. Additionally, newer windows offer better air quality and increased value for your home.
The return on investment for replacement windows is based on a number of factors, including the local climate and the specific window selections. Homeowners in cold climates typically experience higher energy savings, enabling them to recover their initial investments within a short time frame.
Homeowners can also increase their ROI by taking advantage of available incentives for energy-efficient home improvements. These rebates and tax credits help offset the cost of the window upgrade and maximize energy savings.
When choosing replacement windows, it’s important to consider the U-factor, solar heat gain coefficient, visible transmission, and energy star rating. The U-factor is a measure of insulation and the solar heat gain coefficient is how much sun enters the home through the windows. The energy star rating indicates the windows meet certain performance guidelines. The frame material, type of glass, and window style can also affect energy efficiency.
For example, if you choose double-hung replacement windows with wood frames and Low-E glass, you can expect a higher energy efficiency than single-hung or vinyl-framed models. Another option is to opt for a fiberglass composite model, which combines a frame made of recycled plastic resins with a layer of inert gas to create superior insulation.
A well-insulated window is critical to reducing energy consumption. This is because it minimizes the workload of your heating and cooling system. As a result, you’ll enjoy reduced utility costs and enhanced comfort without making major lifestyle sacrifices. You’ll also help save the environment by reducing demand for power, which cuts greenhouse emissions. This is a great way to show your commitment to environmental stewardship.
Curb Appeal
Your home’s windows aren’t just functional; they contribute significantly to your property value and its curb appeal. If you’re not happy with your current windows, upgrading them with replacement units can add beauty and value to your residence.
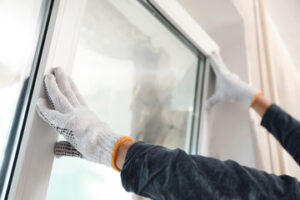
New replacement windows are crafted with care and precision specifically for your home. This ensures they will fit properly and won’t stick or sag over time. They will also look like new, bringing a fresh and updated aesthetic to the exterior of your house.
Replacement windows are architected to offer improved insulation, which will cut down on your energy costs. This reduced reliance on heating and cooling systems will help you save money and reduce your environmental footprint at the same time.
The new insulated glass and advanced framing of modern replacement windows can block out external noise, making your home quieter and more peaceful. This is a major improvement over older windows that allow unwanted sound to travel through single-pane glass and outdated frames.
Many replacement window options come with customization features that let you personalize the appearance of your house. You can choose frame colors and hardware finishes, grille patterns, and window glazing options to create a customized look that suits your taste. Additionally, replacement windows are typically designed to require minimal maintenance.
If you’re selling your home, the curb appeal of your property can make a big difference in the sale price. Prospective buyers will assume that the inside of your house will match the beautiful exterior, and they’ll be more likely to consider it an attractive investment.
If your windows are old and stuck shut, it’s difficult to enjoy a nice warm breeze on a summer morning. Plus, if they’re not locking properly, they can leave your home vulnerable to burglars or inclement weather. Investing in replacement windows will provide you with peace of mind and keep your family safe and comfortable for years to come. Moreover, these windows will increase your home’s overall comfort and increase its resale value. So, don’t wait any longer – invest in new replacement windows today!
Reduced Noise Pollution
Noise pollution is a serious problem that can interfere with your daily life and cause stress. Common sources of noise include traffic, construction, and neighborhood activities. Prolonged exposure to these sounds can lead to sleep disturbances and cardiovascular issues. New replacement windows can help minimize external noises to create a more serene living environment.
The type of glazing used in your replacement windows plays a major role in their soundproofing capabilities. Double- or triple-glazed windows featuring two or three panes separated by a layer of insulating gas (usually argon or krypton) can provide significant reduction in external noise. Laminated glass is another option that improves window soundproofing. This type of glazing consists of two or more layers of glass with an interlayer of polyvinyl butyral or ethylene-vinyl acetate, which acts as a cushion and absorbs sound waves.
In addition to advanced glazing options, the material and design of your replacement window frame can also enhance its noise-reducing potential. High-quality frames made of vinyl, fiberglass, or composite are acoustically superior to traditional wood frames. Additionally, modern frames are designed to be airtight to prevent gaps and cracks that allow noise to seep in.
To ensure your replacement windows are properly fitted and sealed, you should always choose a reputable contractor with extensive experience in the industry. A professional installer can assess your home’s unique characteristics and the predominant source of noise to recommend the most effective solutions. They can also install your new windows correctly to maximize their performance.
With the right combination of advanced insulation, double-pane glass, and specialized window seals, your replacement windows can transform your living space into a peaceful oasis amidst the hustle and bustle of your busy city or suburban community. This feature is a must-have for homeowners looking to maximize tranquility and comfort at home.
Increased Home Value
When you make any kind of significant investment into your home, you want to be sure it has the potential to add value. Thankfully, premium replacement windows can boost your property value in several ways. In fact, they’re one of the best home improvement projects for return on investment.
The energy efficiency and curb appeal that new windows offer make them a desirable upgrade for many home buyers. In addition, a warranty on the installation of new windows can also help increase resale value. This is because buyers will know that any issues with the window installation have already been addressed, and will be less likely to cause problems down the road.
As a result, homes with new windows tend to appraise higher and sell faster on the real estate market. Additionally, because replacement windows can last for decades without requiring any maintenance or repairs, they’re a great long-term investment. If you’re looking to get the most out of your home renovation investment, consider replacing your windows with modern, high-performance models.
In the Montana climate, new windows that effectively keep warm air in during winter and cool air in during summer can significantly reduce energy bills and make your house more comfortable year-round. This is a major selling point for buyers who are conscious about their utility costs, and can easily offset the initial cost of new windows.
Similarly, high-quality windows that reduce outside noises can make your home feel quieter and more serene. This can be a major selling point, especially if you live in an area that’s known for heavy traffic or loud noises from nearby construction sites.
If you’re considering making a change to your Billings-area home, replacement windows are a wise choice. This is because they can provide a number of benefits, from improved aesthetics and energy efficiency to elevated comfort and security. If you’re thinking about upgrading your home, contact a reputable installer to learn more about the benefits of premium replacement windows.